


Denim Pouch Tutorial
It’s hard to believe that the end of the year is just around the corner! This is the time when we start thinking about Christmas presents.
That’s why, for the October Quilt Calendar with Pfaff Suomi, I’ve designed a special project you can make for someone who appreciates handmade gifts.
In our very first Quilt Calendar project this year, we explored the Quilt As You Go technique using old towels. This month, I invite you to try something new with this denim pouch tutorial! Let´s turn unwanted pieces of clothing - old jeans, a hoodie, and a shirt - into a practical and stylish denim pouch. It’s a great way to upcycle old clothes and create a unique handmade gift for someone special.

Ohjeet suomeksi löytyy täältä
Materials:
(All measurements are given as width × height)
Stabilizing layer for exterior: (2) 12 1/4" x 8 3/4" (31 x 22 cm) thick sweatshirt fabric, such as the material used for a hoodie.
An assortment of denim pieces in light, medium, and dark shades. You can also use the wrong side of the denim to create more color variations.
Lining: (2) 10 1/4" × 6 3/4" (26 × 17.1 cm), cut from a shirt.
Tabs: (1) 1¾"× 6" (4.4 × 15.2 cm), use the same fabric as the lining.
Binding: (4) 1 1/2" × 4 1/2" (3.8 × 11.4 cm), use the same fabric as the lining.
Zipper: (1) 8" , 20 cm
Zipper tabs: (2 pieces) Measure the width of the zipper, add ¼″ (6 mm), and cut each piece to that width × 2″ (5.1 cm) long. For example, my zipper measured 1 ¼″ (3.2 cm) wide, I cut the tabs to 1 ½″ × 2″ (3.8 × 5.1 cm)..
sewing machine needles #90 for quilting, #100 for sewing the pouch
Abbreviations:
RS - right side of fabric
WS - wrong side of fabric
SA - seam allowance
Finished size: 6 1/2″ long × 3 1/3″ tall × 3 1/2″ deep (16.5 cm x 8.5 cm x 9 cm)
Lay one piece of sweatshirt fabric with the WS facing up. Place the first denim piece on top, as shown in the photo below. Stitch horizontal lines across the denim piece (white lines in the photo below), sewing through both the denim and the sweatshirt fabric.
The lines can be straight or slightly wavy, evenly spaced or stitched at an angle. Feel free to experiment with the stitching to create your own unique quilting design!

Choose a second denim piece in a contrasting shade. Place it on top of the first piece with the RS facing each other, aligning their right edges. Stitch the pieces together with a ¼" (0.6 cm) SA along the right edge.

Flip the second piece open so that the RS is facing up. Stitch several vertical lines (white lines in the photo below) to secure the piece in place. Start and finish each line of stitching on the sweatshirt fabric beyond the denim edges.

Add the third denim piece to the first two pieces, placing it WS up and aligning it along the bottom edge of the first two pieces (A). Attach it with a ¼" (0.6 cm) SA (dashed line in photo A). Flip the third piece open towards the bottom. Stitch a few horizontal lines (B).

Continue adding denim pieces in a clockwise direction (pieces 2,3,4,5 in the photo below) until the sweatshirt fabric is completely covered, working your way around the first piece.


As you progress, you will need longer pieces of denim. You can cut them as single pieces (for example, piece 3 in the photo above) or join several smaller pieces together to get the required length (as with pieces 4 and 5 in the photo above).
Remember to play with contrast by placing different shades of denim next to each other. You can also use the wrong side of the denim to introduce even more color variations.
Create a second quilted panel in the same way, following steps 1 - 4.
Cut two 10 1/4" × 6 3/4" (26 × 17.1 cm) exterior pieces from the quilted panels. Set your stitch length to 2.0 and stitch around both pieces, ⅛" (0.3 cm) from the raw edges, to secure the quilting stitches.

Make tabs:
Fold the 1¾" × 6" (4.5 × 15 cm) strip of fabric half lengthwise and press to create a centre crease. Open the strip and fold both long edges inward to meet the centre crease. Press.
Fold the strip in half again along the original centre crease, enclosing the raw edges, and press once more (see Photo 1 below).
Topstitch along both long edges, ⅛ " (0.3 cm) from each edge (see Photo 2). The finished strip should measure approximately ⅜" × 6" (1 × 15 cm).
Cut the strip into two tabs, each measuring approximately ⅜" × 2¾" (1 × 7 cm).
Fold each tab in half, bringing the short raw edges together, and stitch across the raw edges ⅛" (0.3 cm) from the edge to secure them (See Photo 3).
Set the tabs aside.

Attach zipper tabs: First, stitch across both sides of the zipper tape approximately ¼" (0.6 cm) above the beginning of the zipper teeth.

Place the zipper tabs RS together, sandwiching the zipper between them (as shown in the photo below).
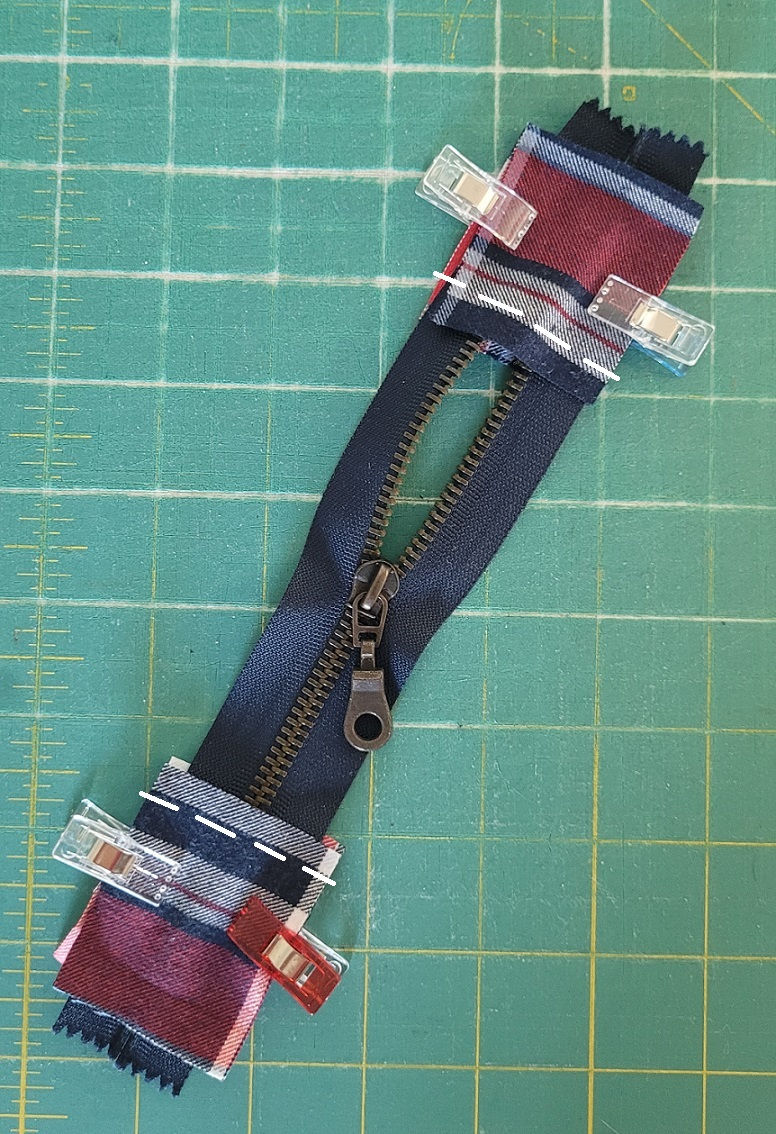
Stitch across the tabs just above the beginning of the zipper teeth (dashed lines in the photo above).
Flip the zipper tab RS up so that the seams are hidden inside, and press.
Repeat the same process to attach the other pair of zipper tabs to the opposite end of the zipper.
Finally, trim the zipper tabs so that their width matches the width of the zipper tape on both ends.
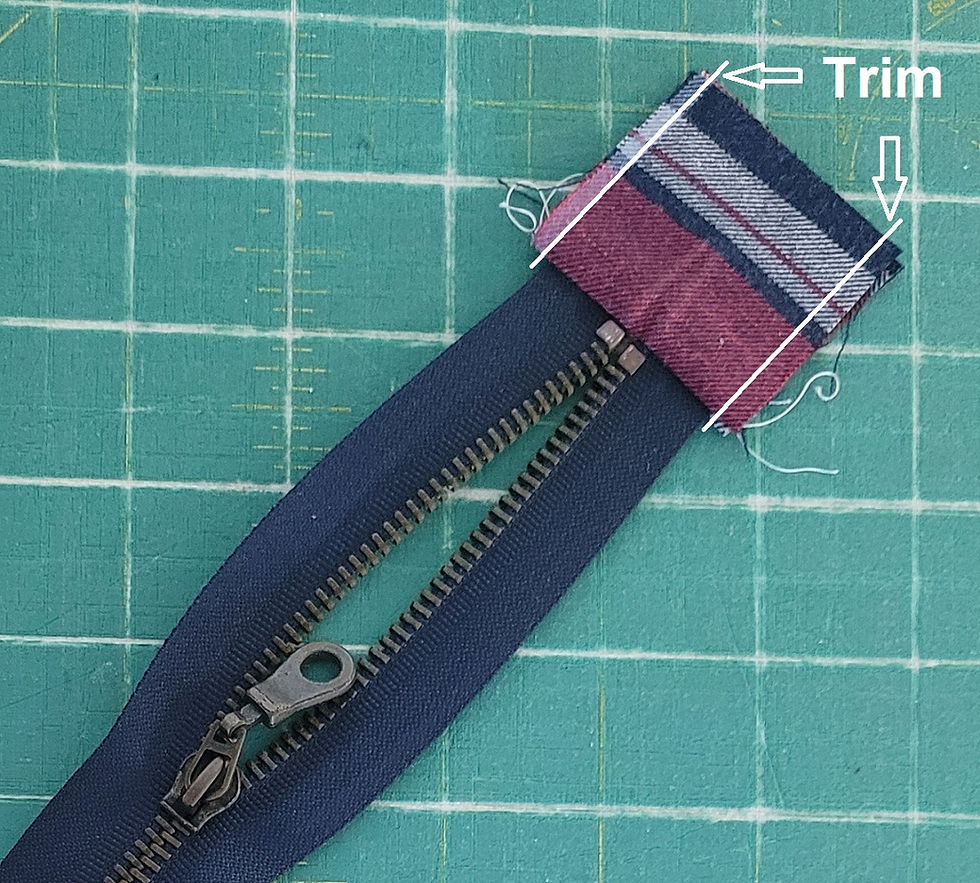
Attach zipper: Mark the centre of the zipper and the midpoint along the top edge of each 10¼" × 6¾" (26 × 17.1 cm) exterior and lining piece (white marks in the photo below).

Place the back exterior piece RS up and position the zipper on top, WS up, with the zipper pull on the right. Align the centre marks on the zipper and the exterior. Clip or pin the zipper in place.

Baste the zipper to the back exterior panel using a ⅛" (0.3 cm) SA and a longer stitch length.

Next, place the lining piece on top, WS up, sandwiching the zipper between the exterior and lining. Stitch along the top edge of the lining using a ¼" (0.6 cm) SA, stitching the exterior, zipper and lining together. Be sure to backstitch at the beginning and end of your stitching.

Turn the exterior and lining RS out and press the seam along the zipper. Topstitch ⅛" (3 mm) from the seam.

Repeat the same process to attach the other half of the zipper to the front exterior and lining pieces.
Trim the zipper tabs so that they are the same length as the pouch. Check the lining measurements and trim the lining pieces if necessary to ensure they match the exterior panels.

Attach the tabs: Position the tabs as shown in the photo below, aligning their raw edges with the right and left edges of the zipper tabs. Baste the tabs in place at ⅛" (3 mm) from the aw edge.

Open the zipper. Separate the exterior and lining pieces. Place the two exterior pieces RS together and stitch along the bottom edge using a ¼" (6 mm) SA. Repeat with the lining pieces, stitching along the bottom edge with the same SA, but leave an approximately 4" (10 cm) opening in the middle for turning the pouch right side out.

Press the SA open on both the exterior and lining. On the exterior, hand-stitch the SA to the sweatshirt fabric. Make sure that your stitches are not visible on the RS of the pouch.


Turn the pouch RS out through the zipper opening. Tuck the lining inside and smooth it out to ensure it is evenly distributed.
Align the bottom seam of the exterior with the bottom seam of the lining, positioning both seams in line with the zipper. Use clips to hold these points together.

Mark a 1¾" × 1¼" (4.2 × 3.2 cm) rectangle at each bottom corner and cut out the corners using scissors.

Open the zipper and turn the pouch WS out. Separate the exterior and lining layers (Photo 1 below). Align the raw edges of the exterior and lining pieces (Photo 2), then clip them together (Photo 3 shows the exterior side, Photo 4 - the lining side). Stitch through all layers using a ¼" (6 mm) (Photo 3).

Turn the pouch lining side out through the opening in the lining. The exterior is inside the lining.

Stitch the corners:
Align the raw edges of the lining and exterior at one corner and clip them together as shown in the photo below.

Measure and mark ¾” (1.9 cm) from the top end of the corner (towards the zipper).

Connect the seam line on the lining to this marked point to create the new corner (yellow line in the photo above). Stitch along the marked line with a ¼” (6 mm) SA.

Trim the excess fabric along the marked line within the SA. Repeat the same process for the remaining corners.

Bind the corners:
Place a binding strip over the corner, aligning the raw edges as shown in the photo below.

Clip in place. Stitch directly along the existing seam line, securing the beginning and end of your stitching. Flip the binding up and fold the short edges towards the centre. Finger-press the folds.

Then fold the raw edge of the binding twice so that it covers the seam. Use clips to hold the binding in place.

Hand-stitch the binding in place.
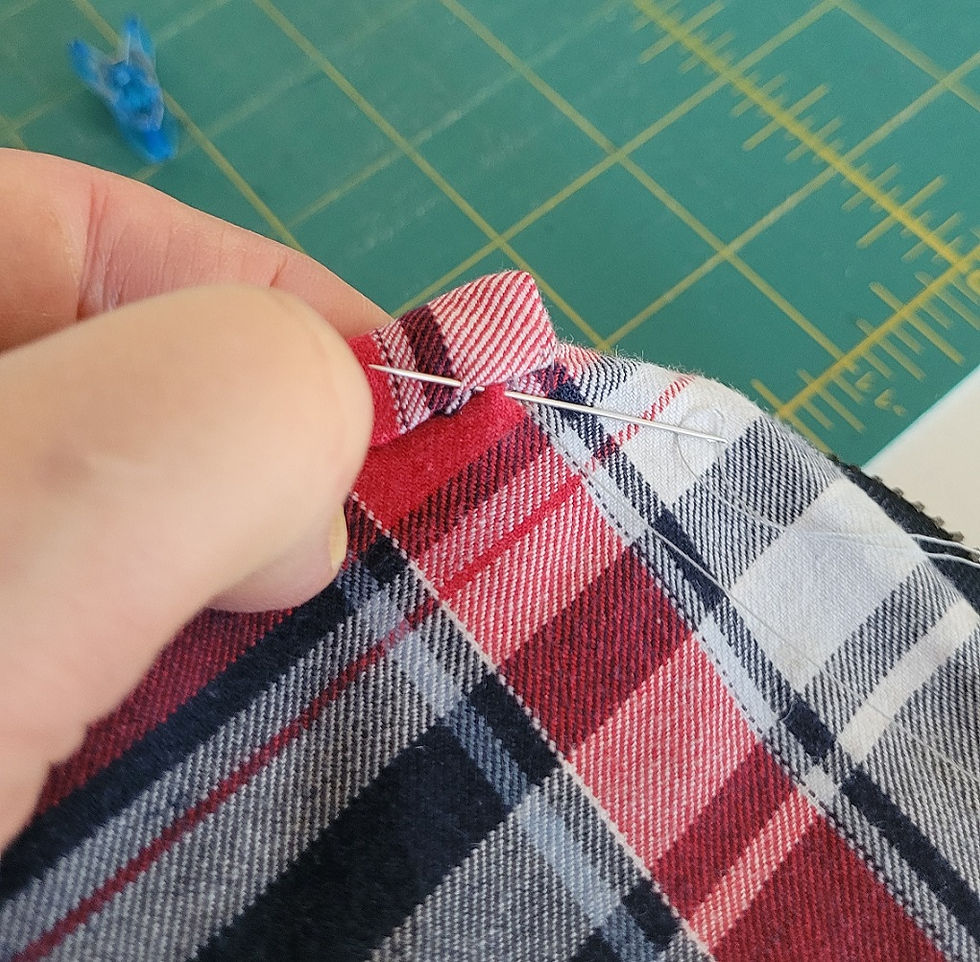
Repeat the same process for all four corners.

Turn the pouch RS out. Smooth the corners with your fingers.
Your pouch is ready!
Here are a few glamorous shots of the pouch, taken on a glorious autumn day at Munkkiniemenranta in Helsinki.


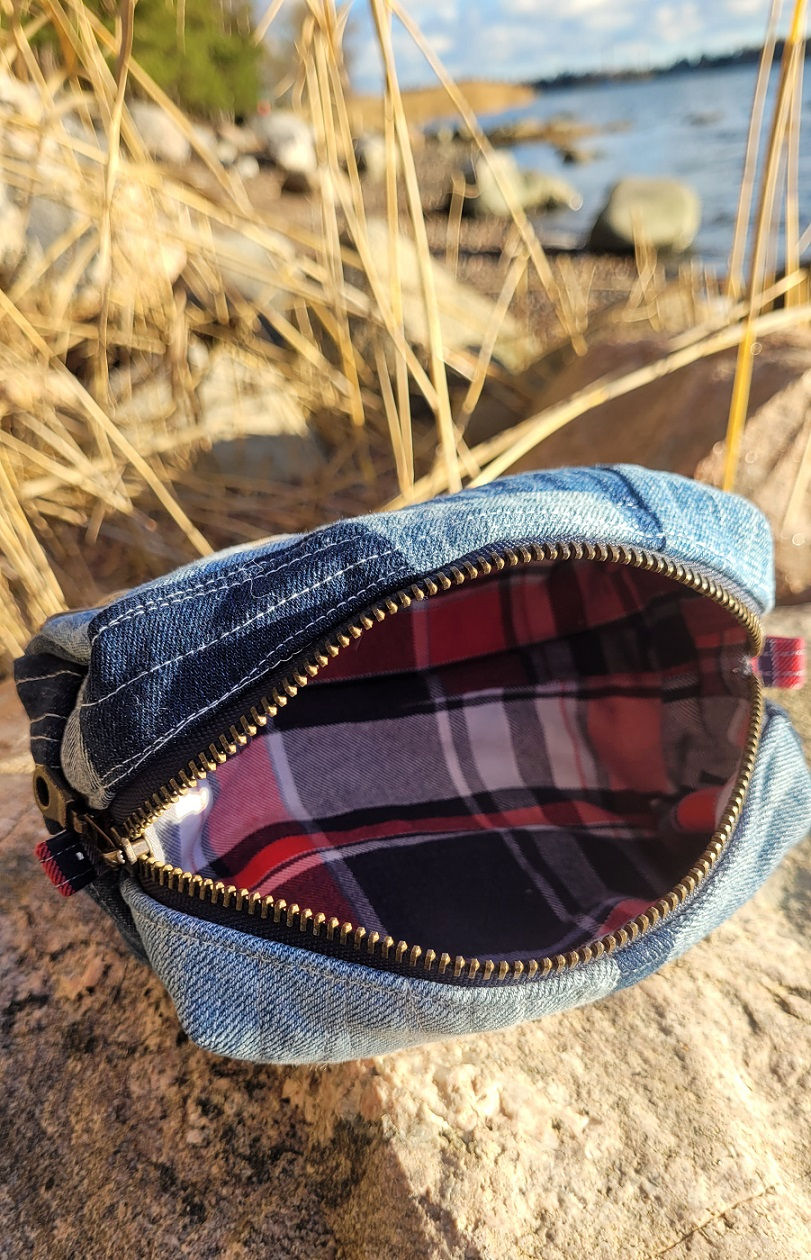
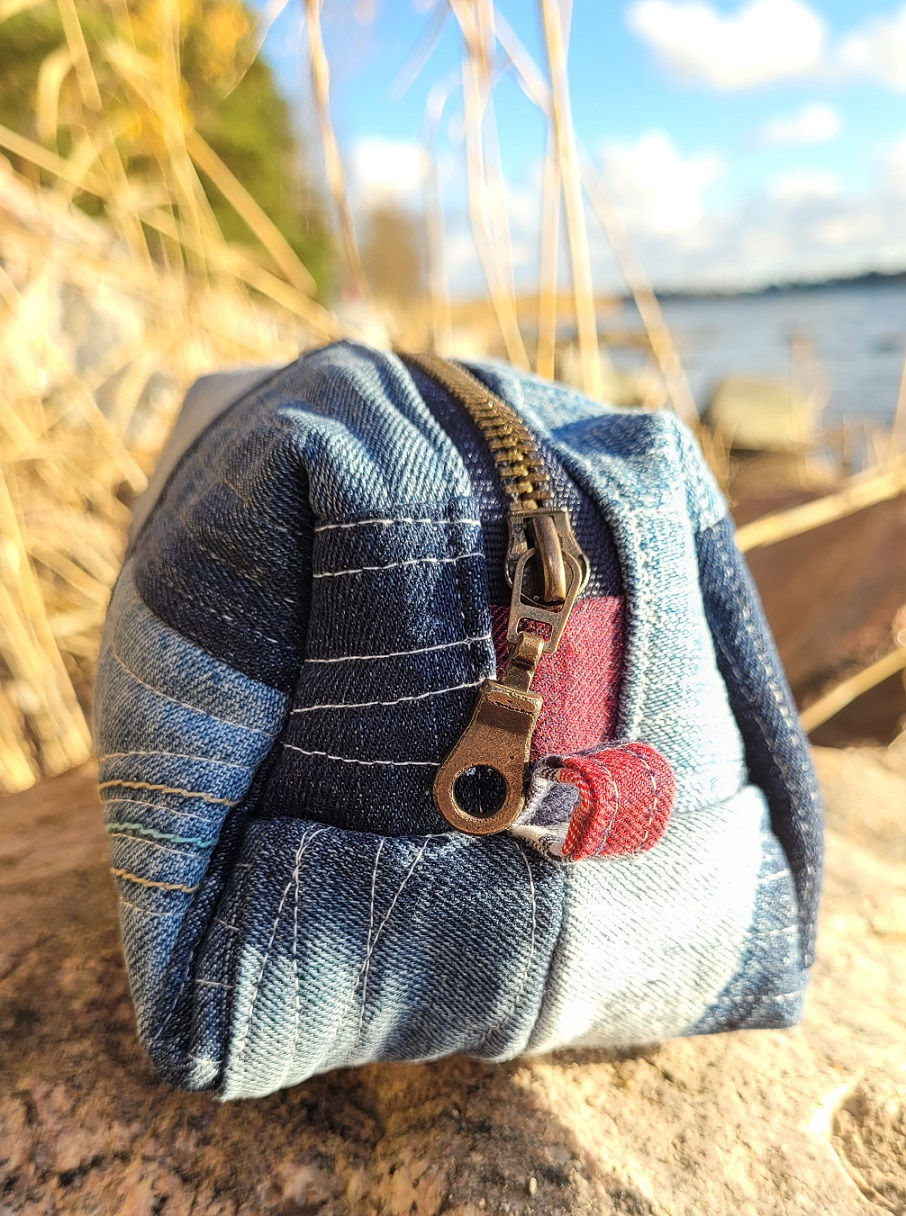

This pattern is quite addictive! I couldn’t resist making another pouch, this time in a larger size.


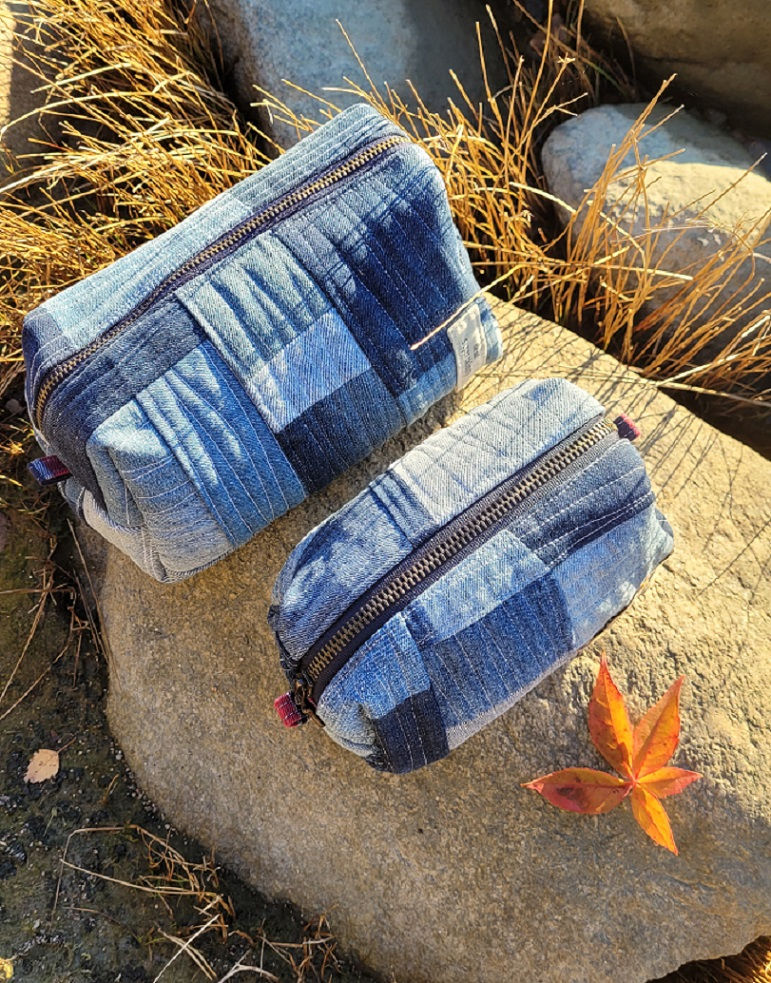
I hope you’ll feel inspired to create your own version and share it on Instagram! Don’t forget to tag @nordiccrafter and @pfaff_suomi so we can admire your beautiful creations.
If you enjoyed this free pattern, please respect the time and effort that went into creating it. This pattern is provided for personal use and gift-making only and may not be sold, redistributed, or used for commercial purposes.
Happy stitching! 💖



Comments