


Chenille Hot Pad
Spring is finally here! In Finland, this means one very important thing: grilling season is just around the corner.
For the April Quilt Calendar project, Pfaff Finland has designed a practical and sustainable sewing project using recycled materials – the Chenille Hot Pad. It’s a perfect accessory for the kitchen or outdoor cooking, combining functionality with beautiful texture.
This month, we’re exploring the chenille technique, also known as the slash technique. The word chenille comes from the French term for caterpillar, a fitting name that describes the soft, fuzzy texture created when layers of fabric are cut and brushed. In quilting, this technique involves stitching and then slicing through multiple fabric layers to produce a rich, fluffy surface full of depth and colour variation.
The chenille technique is a wonderful way to use fabric scraps, experiment with colour, and add tactile interest to your projects - all while creating something truly useful.
Let’s get started!

What You’ll Need:
1–3 pairs of washed old jeans (in different shades of denim)
Bias tape (or make your own binding )
Sewing thread
Micro-tip Pfaff scissors or straight appliqué scissors (or any sharp scissors with fine points important for the chenille cutting step)
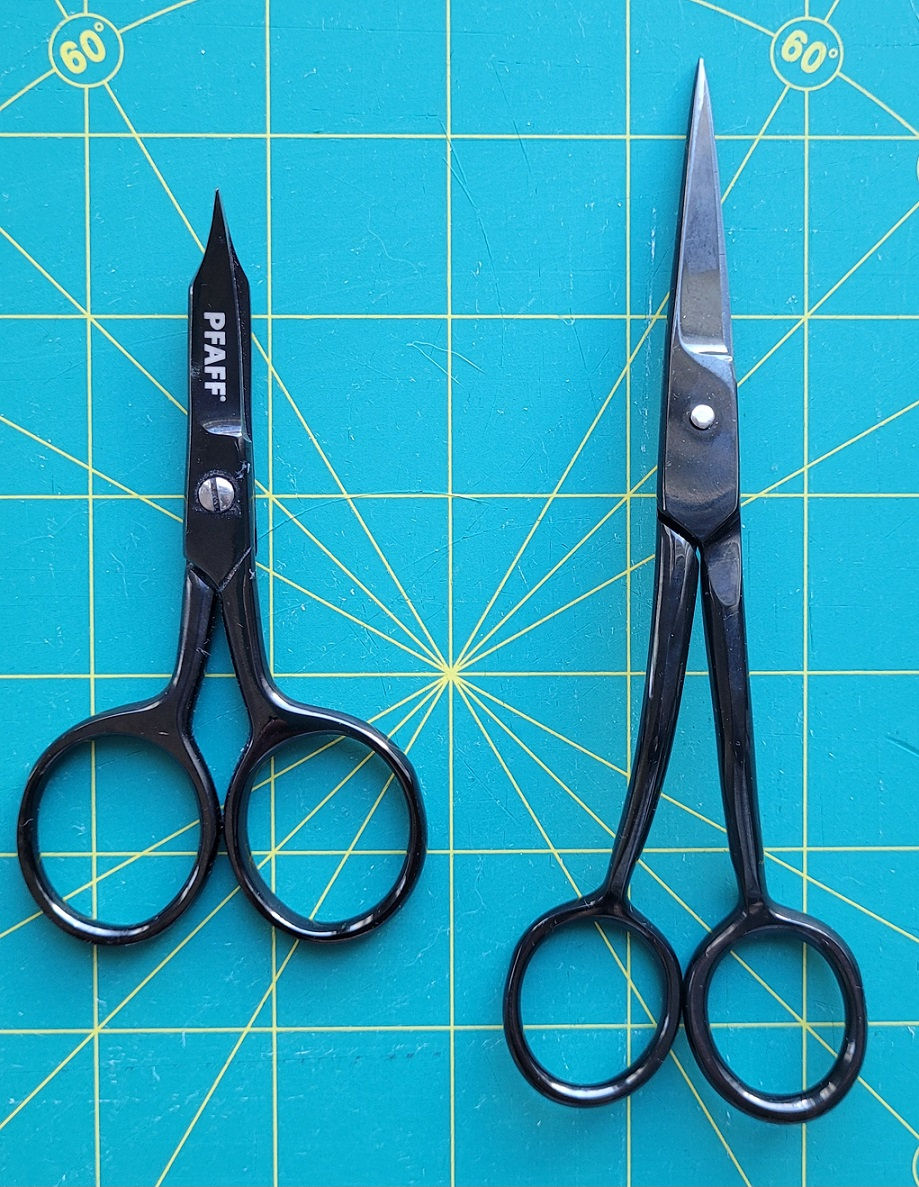
Microtip scissors (left) and straight applique scissors (right)
Ohjeet suomeksi löytyy täältä
Cut 4–5 pieces of denim measuring 25 × 25 cm (10" x 10"), using different shades.
Stack 3–4 pieces of fabric on top of each other in any arrangement you like. You can place the right sides facing up or down - this will change which colours show through in the finished chenille.
Place one additional piece underneath as the background, with the wrong side down and right side facing up.
You may find it helpful to sketch your design on paper first. Plan the sections and keep the lines about 1.5 cm (½ inch) apart. Once you’re happy with the layout, mark the quilting lines on the right side of the top fabric layer.
Select a straight stitch and sew along the main quilting lines, stitching through all layers.

Use a guide to help keep the quilting lines straight and evenly spaced. The Laser Guide on the Expression™ 725/750 or an Adjustable Guide Foot on other models will make this step easier. Adjust the spacing to 1.5 cm (½ inch).
Once the main quilting is complete, you can decorate selected lines with satin stitches or other decorative stitches if desired.

7. Trim the edges to square the hot pad.
Attach the bias tape around the edge.

Carefully cut open the fabric layers between the stitched lines using micro-tip or straight appliqué scissors, leaving the bottom layer uncut.
Wash the hot pad in the washing machine. While it is still slightly damp, gently open and fluff the chenille cuts to enhance the texture.
Your Chenille Hot pad is ready to use!
If you decide to make a Chenille Hot Pad using this tutorial and share it on Instagram, please tag @pfaff_suomi and me @nordiccrafter so we can admire your work!
Happy Sewing!❤



Comments